
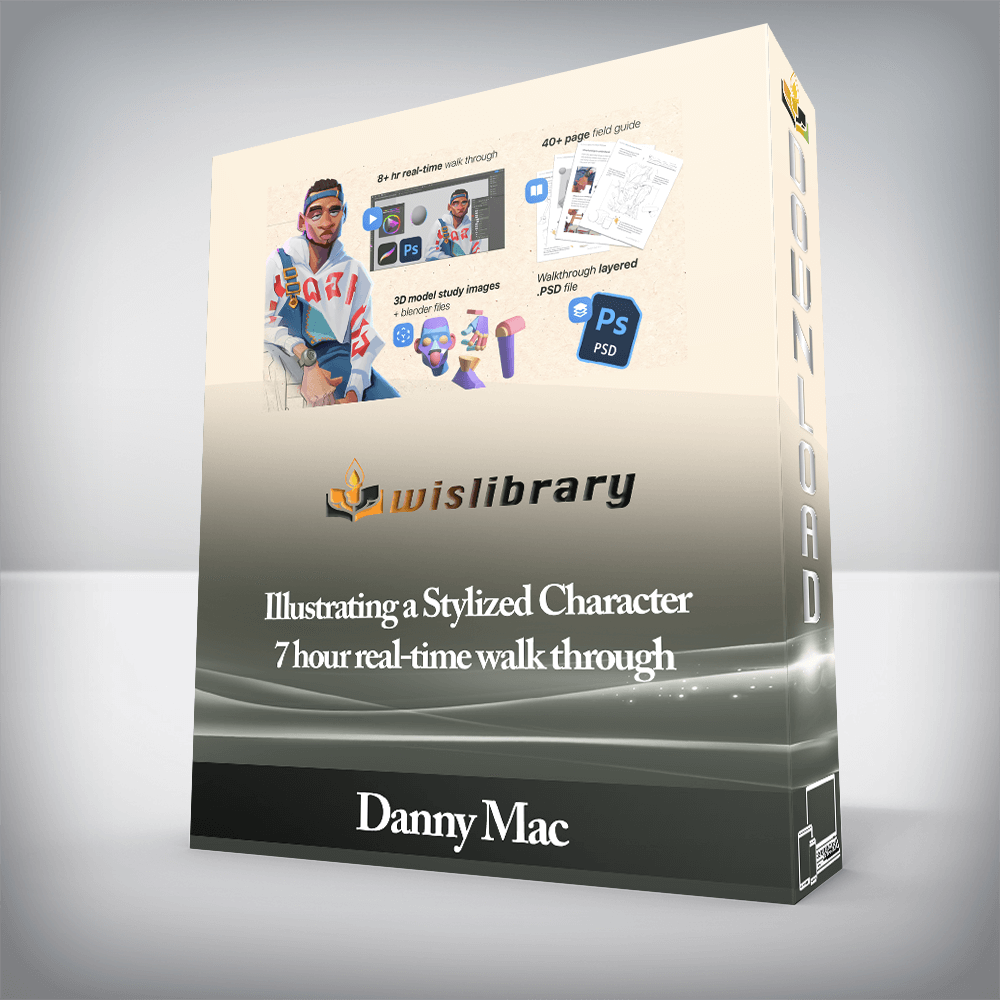
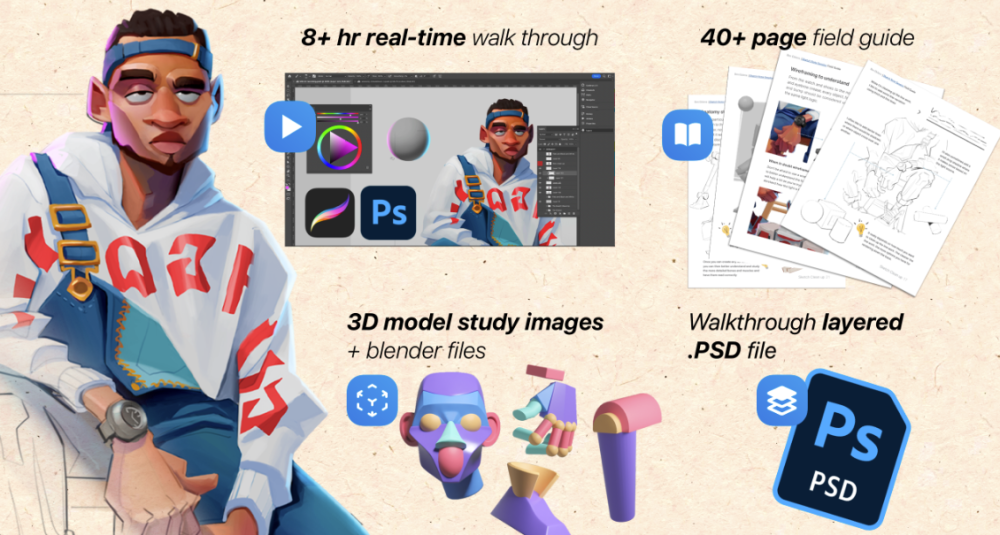
This is a real-time walk-through filled with actionable, in-context explanations of my thoughts and techniques when it came to creating this character from sketch to rendered painting.
Taking you behind the scenes into my thought process where I explain my techniques and more importantly ‘why‘ I’m doing certain things that otherwise might have been a bit too tricky/lengthy to tackle through a social media post or short video.
In this 7+ hour walk-through, my goal is to show you my answer to these questions in the context of illustrating this character from scratch.
By the end of this tutorial, you’ll have an understanding of…
So, If you’ve enjoyed my free stuff on Instagram like these kind people:
“I am so used to drawing traditionally so I always have a hard time understanding painting digitally but your tutorials make easier for me to understand some stuff. I hope, I’ll get there someday. Thank you so much 💛” – @_elvisart
“Amazing as always!!! I learn so much from your posts” – @rafaarroio
“Hey, I just want to say that I love your tutorials 🥰 you give so many wonderful tricks that I always save them all! And your stylization is awesome! Thank you for your help! 🐻” – @candykiki_art
I think you’ll get a lot out of this one.
Hey there, 👋
I’m Ben, an Aussie that loves to draw, paint, learn how to learn and share my findings and ‘aha’ moments online.
You might have seen some of my work/sketch notes and time-lapses on my Instagram, Twitter or TikTok.
Over the past year or so, I’ve built a bit of a following online where I share my illustrations, sketches, and more interesting to me (and apparently to a few others) the thought process and techniques on how I got to the end result.
A huge shout-out is in order for those of you who have been following me on my journey so far– without you, this tutorial probably wouldn’t exist.
If by chance you do end up grabbing this –do me one favour, please…Squeeze as much actionable knowledge out of it as possible, and probably go create something awesome with it. There’s no use in sitting around in your inbox doing nothing.
Oh and If you do, please tag me, I’d love to see it!.
As always, stay consistent, use reference, have fun with it and remember, it’s only pixels baybee 🕺✍️
Cheers,
Ben ✌️
This isn’t a lazer-focused course on any one particular topic like rendering, lighting, stylisation, perspective, likeness, photoshop etc. They’ll be coming for sure… but this is not one of them.
A real-time walk-through from start to finish of a stylised character illustration touching on many topics and filled with my thoughts, tips and tricks as I’m needing to use them to accomplish this particular character design/illustration. Everything I talk about/demonstrate is in the context of this character/illustration.
There are no reviews yet.

You must be <a href="https://wislibrary.net/my-account/">logged in</a> to post a review.