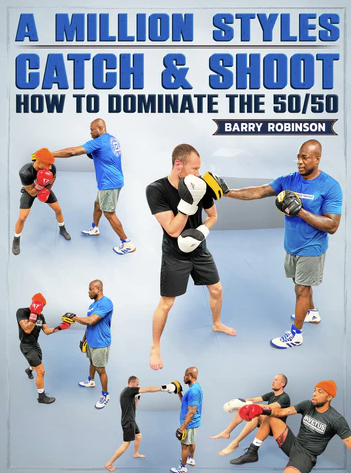
Counter Explosively From Common Situations With Coach Barry Robinson’s Strategies And Techniques For Catching & Shooting In The 50/50 Situations Of Striking!
- Catch and counter common strikes like the jab, double jab, and cross, with follow up strikes, combinations, and more
- Join Barry for this Installment of his A Million Styles tutorial series, where he teaches you in-depth lessons on important boxing tactics and techniques
- See how to shut down their offense with smothering, catching, and more on this 4-volume series, before coming back with effective strikes of your own
- Work against hooks and 1-2’s with your own returns that Coach Robinson will teach you to develop in safe and realistic ways
- Coach Barry Robinson is an elite striking coach who has helped top athletes reach their true potential – and now he is giving you some of the same lessons and coaching he gave them!
Check out a free sample:
So, What Exactly Do You Get?
PART 1
A MILLION DIFFERENT COUNTER PUNCHES
THE PLAYBOOK
A MILLION STYLES COUNTER PUNCHING
COUNTERING OFF OF CATCHING THE JAB
- CATCH THE JAB – JAB
- CATCH THE JAB – CROSS
- CATCH THE JAB – LEAD HOOK
- CATCH THE JAB – STAB
- STAB WITH THE CROSS
- CATCH THE JAB – LIVER
- CATCH THE JAB – OVERHAND
- CATCH THE JAB – POST FIVE TO THE BODY
- CATCH THE JAB – STICK JAB W/1 TWO JAB TO THE LEFT
- CATCH THE JAB – 3/4/3
- CATCH THE JAB – 5/3/4/3/2
- CATCH THE JAB – W/V TECHNIQUE – STARVE THE POT TWO TIMES FINISH WITH CROSS
PART 2
CATCHING THE DOUBLE JAB OR TWO JAB
- CATCH THE DOUBLE JAB – 2/3 POST 2/3
- CATCH THE DOUBLE JAB – CATCH THE JAB STEP BACK CATCH THE JAB 5 TO THE BODY 3
- CATCH THE DOUBLE JAB – SMOTHER PHYSICAL DOUBLE POST ACE DEUCE
CATCH THE CROSS
- CATCH THE CROSS – 2
- CATCH THE CROSS – 5 TO THE BODY
- CATCH THE CROSS – 2/3
- CATCH THE CROSS – 1/2
- CATCH THE CROSS – 5 TO THE BODY 4/3/2
- CATCH THE CROSS – 2 POST 2/3/3/2
CATCH THE CROSS – COUNTER TO COUNTER
- CATCH THE CROSS – 2 CATCH THE CROSS 2 POST 2
- CATCH THE CROSS – 2 CATCH THE CROSS 5 TO THE BODY POST SAME HAND 6/3/2
PART 3
CATCH THE HOOK
- CATCH THE HOOK 2
- CATCH THE HOOK 3
- PULL THE HOOK 3
- CATCH THE HOOK 5
- CATCH THE HOOK 5 TO THE BODY
- CATCH THE HOOK TURN HIM/HER 4 OR 6
- CATCH THE HOOK 2/3 TURN HIM/HER TURN HIM/HER
- PULL THE HOOK – 3/2
- CATCH THE HOOK – 2/3
PART 4
CATCH THE 1/2
- CATCH THE 1/2 – 1/2
- CATCH THE 1/2 – 2/3
- CATCH THE 1/2 – 5/3
- CATCH THE 1/2 – TYSON
- CATCH THE 1/2 – 2/3/3/2
- CATCH THE 1/2 – POST 2
- CATCH THE 1/2 – POST 3 OVERHAND
- CATCH THE 1, 3, COUNTER WITH THE 1, 2
- CATCH THE ONE 1, 3 COUNTER WITH THE 2, 3
- CATCH THE ONE 1, 3 COUNTER WITH THE 5, 3
- CATCH THE 1, PULL THE 3, COUNTER WITH 3, 2
- CATCHING THE 3, 2
- CATCHING THE 3, 2 COUNTER WITH THE 5, 3, 2
- CATCHING THE 3, 2 COUNTER WITH THE 2, 4, 2
- CATCHING THE 3, 2 COUNTER WITH THE OVERHAND 4, 3, 2
- PULL THE 3, CATCH THE 2 COUNTER WITH 2, 3, 2
- CATCH THE 2, 3 COUNTER WITH 2, 3
- CATCH THE 2, PULL THE 3, 3, 2
- CATCH THE 1, 2, 3 COUNTER WITH 2, 3
- CATCH THE 1, 2 PULL THE 3 COUNTER WITH THE 3, 2 SLEEPYTIME
- BONUS: WHY WE DIDN’T CATCH THE BODY SHOTS
- CONCLUSION


You must be <a href="https://wislibrary.net/my-account/">logged in</a> to post a review.